This past Saturday was a beautiful fall day here in Jersey. A perfect day for a Warrior’s Workout in the Park! This workout was directly inspired by Zach Even-Esh’s Ultimate Underground Strength System.
Warrior Workout
15 minute warm-up – mobility, movement, animal crawls, band work, breathing exercises followed by… 1) KB Clean & Press – 5×5 2A) Picnic Table Push-ups on fists – 4 x submax 2B) Thick Tree Branch Pull-ups – 4 x submax
3A) KB Goblet Squats 4×10 (forgot to take pics of these – sorry guys!) 3B) KB Swings 4×10
4) Abs / Grip work 3 sets each
The cool-down consisted of various yoga asana and breathing exercises as both normalizing work and compensatory movement.
Hope you enjoyed this! How did you workout this weekend? Let me know!
Historically, ninja were the consummate combination of super spy / super soldier. They possessed outstanding levels of fitness due to their intensely physical training and highly demanding mission requirements.
Their levels of fitness and training have been the subject of many stories and the genesis for many myths surrounding them.
How did they do it?
How did they train?
What type of methodology did they employ since creating this kind of warrior certainly required a very diverse fitness profile?
Ninja fitness needs were much more multi-faceted than most physical pursuits. They had to be as they were at once a combination of Olympic decathlete, Navy Seal, and martial arts master rolled into one. Let’s examine this a little more closely though, what kind of qualities did they possess and what did they need to be able to do?
Ninja Must Possess …
Strength
Agility
Coordination
Excellent balance
Flexibility / Mobility
Whole body power
Endurance
Ninja Must Be Able to….
Move silently
Run fast
Walk far
Leap high
Climb trees, walls, castles fortifications, etc.
Wield weapons
Fight unarmed – striking, kicking, grappling, locking, choking, etc.
Roll / fall / dodge / avoid
Crawl
And more…
As you can see from the 2 lists above, the ninja had a wide range of skills and abilities that had to be supported by a comprehensive fitness program keeping him at the top of his game.
Remember that for a ninja, fitness wasn’t just a nice to have; it was an absolute necessity to accomplishing his mission and getting him home safely. And the kicker is, they did it all with little to no fitness equipment.
Certainly a 16th century ninja did not possess a Gold’s Gym membership. Nor did he own an Olympic weight set or have a stair master at his disposal. And, while kettlebells and dumbbells would have been great, he most likely had never laid eyes on either one.
So here we have one of the most highly trained and fit agents the world has ever seen created without the use of modern training equipment or modern training methods.
What might some of this training looked like?
I’m glad you asked. One of my favorite scenes in Hatsumi Sensei’s early Bujinkan training videos (DVDs now for you younger folks!) comes from Shinden Fudo Ryu. Here’s a short clip I found on Youtube. This stuff is seriously old school!
“One trains using the things of nature to make the body strong” – Hatsumi Sensei
What if we were to take the spirit of historical ninja fitness training and combine it with a little modern sports science and know how?
Modern methods allow us to take advantage of periodization, or programing and organizing training, to create a comprehensive fitness plan which will apply logical sequences to get the most out of each session. Protocols like HIIT, high intensity interval training, will be utilized to maximize both aerobic and anaerobic endurance in the same short, high intensity session.
Advances in recovery work from such sessions will allow us to recover faster thus making gains greater, and increasing our overall general physical preparation (GPP) will allow us to push higher into more sophisticated training. Effectiveness and efficiency will be combined in order to allow for shorter training sessions which maximize the use of one’s time.
As the ancient ninja did, we will create a strong, supple, highly conditioned warrior and accomplish this with little to no fitness equipment. We will, as Hatsumi Sensei says in the video clip above, use the things of nature to make the body strong.
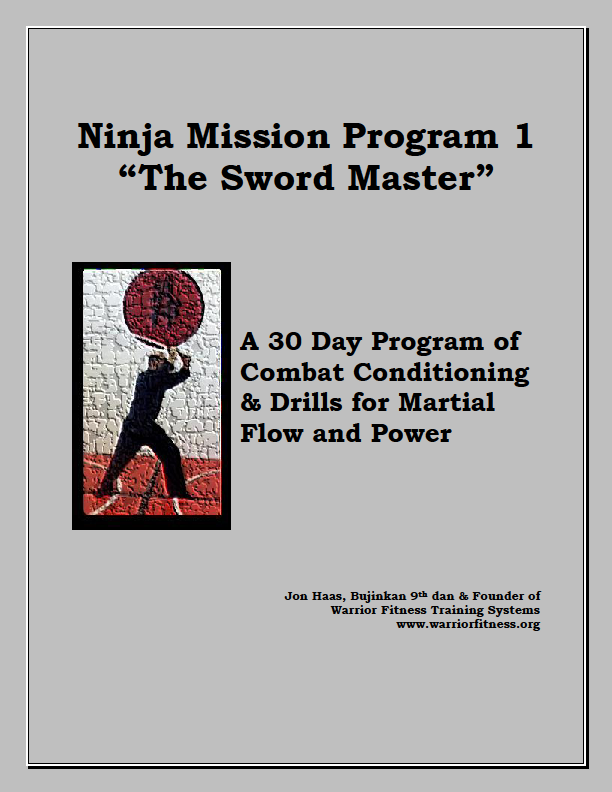
If I were able to point to just one resource for the warrior that combines old school training with modern sports science, I’d look here… Ninja Missions <<==
Before leaving on our 11-day family vacation at Walt Disney World in Florida, I was a little concerned about the possibility of missing my regularly scheduled Warrior Fitness workouts. While I was looking forward to the family time and the amazing experiences that only Disney (and Universal Studios – Harry Potter was awesome!) can provide, I was also trying to figure out how I could escape from the parks and get in some Warrior Fitness style training every day. Well, it turns out I couldn’t break away. We were in the parks almost every day from opening to dinner time, and sometimes back after dinner for fire works too! But, since I’m a good ninja, I adapted! Here’s how…
It’s amazing how much walking you do on a daily basis at Disney. Whether it’s with Mickey, Donald, and Goofy in the Magic Kingdom, or walking through 11 different countries in Epcot, exploring Hogsmeade and Hogwarts Castle at Universal Studios, or hanging with the mammals over at Animal Kingdom, you are walking or standing in line literally all day long. So, the question for the warrior is, how do you put all this walking and standing to good use? Train while you do it, of course! While the walking alone is good enough for most ordinary folks, warriors require a little more. So here’s a little sample of what I did to enhance it:
Push a child in a stroller as you walk. Add a backpack to increase the weight.
Carry that child intermittently while walking or standing in long lines. A child is an odd object – who needs kegs, kettlebells, or sandbags when you can carry a kid! They constantly move, squirm, change posture or position while being carried!!
Focus on moving and pushing the stroller from the core (hara) and not from the shoulders.
Balance – stand in line on one foot. Do it while holding your odd object (child).
Grip training – crush grip the stroller handle for 5 seconds. Rest and repeat. Do left, then right, then both hands. Contract the core, exhale hard and crush the handle. Also, isometrically try to “bend” the handle – first make sure it’s sturdy enough, your wife will kill you if you actually succeed!
Breathing – there are tons of opportunities to enhance walking and carrying through breath training. Match your breath to your steps. 1 step inhale, 1 step exhale. Try to make it up to 10 steps on an inhale followed by 10 steps on an exhale. Or, 5 steps inhale, 5 steps hold full, 5 steps exhale, 5 steps hold empty. Try to see how many steps you can take carrying your child on an empty breath hold. Do the same on a full breath hold. Don’t forget to ride a rollercoaster too – screaming and laughing are great breath training!
Bodyweight squats while holding your child in line.
These examples above will help keep you focused, training, entertained, challenged, and present while your kids have a magical time in the parks.
If you have any energy left when you get back to the hotel room, bang out a few sets of push-ups to round out your workout for the day. And, lastly, joint mobility and yoga asana are a great way to prepare your body for the rigours of Disney. Don’t neglect your 10 minute warm-up in the morning before heading out. It’s a life saver!!
Trust me, there are ample training opportunies outside of your regular workouts. You just have to be a little flexible and creative.
Looking for a way to justify all the upcoming holiday weekend festive food and alcohol consumption? Try spicing up your 4th of July weekend with an intense workout or 2 to (maybe) balance it out. Here are 2 different hardcore challenge workouts that you can do pretty much anywhere with just your bodyweight and a pull-up bar. No pull-up bar, no problem – go outside and use a tree branch!
Strength Endurance Workout
100 Bodyweight Squats
100 Push-ups (break up into as many variations as you like: fist, finger tip, wrist, hindu, etc.)
100 Mountain Climbers
OR
Conditioning Workout
10 Pull-ups (any variation you like)
10 Burpees
10 Ichimonji Jump Squats (switch sides each round)
10 V-ups
Complete as many rounds as fast as possible in 15 minutes.
Good luck and have a happy, healthy, and safe 4th of July weekend!
Hone Your Mind, Invigorate Your Spirit, and Make Fierce the Body with Warrior Fitness!
Summer is coming and, hey, let’s face it – even warriors need to look good at the beach, right?! So, if you’re going to workout with the intention of getting is shape for summer, why not do it in a balanced, functional manner that syncs up with and supports your other activities rather than distracting from them? To that end, here’s a newly designed Warrior Fitness workout to help tone and sculpt that beach body!
Pull-up Pyramid
Start with 1, pyramid up to 3, then back down to 1
Depending on your fitness level, do pull-ups, chin-ups, or commando pull-ups
Push-ups
5 Pike Push-ups(begin in downward facing dog posture, bend arms to touch head to ground)
10 Hindu Push-ups
5 Diamond Push-ups (hands are touching at pointer fingers and thumbs directly under chest)
10 Fist Push-ups
End with a static hold mid range of the push-up position for 1 minute
Dips
4 sets of 10
Use a bench, chair, or couch
Bodyweight Squats
4 sets of 15
If too easy, make them jumping squats
Seiza Step-ups(Begin in seiza, Japanses kneeling posture, on the balls of your feet. Step up right leg, followed by left leg to half squat so legs are 90 degrees, then back down to seiza.)
4 sets of 10/10
Static 1/2 Squat
Hold mid range of squat for 1 minute (wall sit)
V-ups
2 sets of 10
Warrior Sit-ups
2 sets of 10
Plank
Finish with static plank hold for 1 minute
Side plank 30 seconds per side
Take a look at the vibration drills in this article to see how to shake out and release that residual muscle tension.
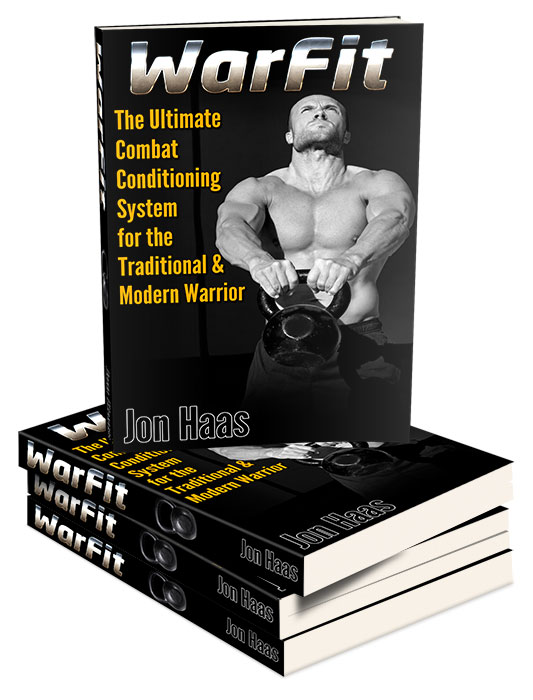
Want to know more? The strength and conditioning exercises in Warrior Fitness will not only provide a strong, functional body, but help burn fat and build lean muscle as well. When used in conjunction with the mobility warm-ups, breathing exercises, and compensatory cool-down movements in the book, Warrior Fitness is a fully balanced approach to fitness and conditioning!
If you’re like me and can’t stand to waste any amount of time no matter how short, you’ll love how isometrics can fill in some strength gaps. Nowadays, my days are jam-packed full with work, meetings, conference calls, networking, family time, training time, teaching time, writing time, and oh yeah – a little sleeping in my spare time. Since there are never enough hours in the day to accomplish all the things I want to do (not to mention those pesky things I have to do!), I try to make the most of those few free minutes of downtime in between tasks so I can be just a little more productive.
The only way to constantly improve is to consistently work on improving your self. One of my favorite quotes of all time is from Calvin Coolidge:
“Nothing in this world can take the place of persistence. Talent will not; nothing is more common than unsuccessful people with talent. Genius will not; unrewarded genius is almost a proverb. Education will not; the world is full of educated derelicts. Persistence and determination alone are omnipotent.”
And, since I don’t consider myself particularly talented, or even all that smart, it’s a good thing I am persistent!
So, let’s talk isometrics.
Isometrics are a great way to work on increasing strength, or shoring up a strength deficiency in a certain movement or exercise, with virtually no equipment and very little time. They are both effective and efficient – good news for us!
So what exactly are isometrics? Basically, isometric exercise is exerting force against an immovable object. The idea is that the length of the muscle does not change, but the tension remains constant during the exercise. There are 2 general types of isometric exercise:
1. Holding yourself (or a weight) in a static state. For example holding the mid-point of a push-up position or the mid-point of a squat. Or, holding yourself statically on a pull-up bar.
2. The other type of isometric exercise consists of pushing or pulling against an immovable object. This picture of Bruce Lee is a great example of just one of the ways he used to train isometrics.
For our purposes, when training the first type of isometric drill, try holding the mid-range or hardest point of the exercise for 30 to 60 seconds. Make sure to keep breathing! Then shake it out – see the vibration exercises here – and go again.
We will use much shorter time frames for the second type of isometric exercise. Here we will be pushing or pulling against an immovable object as hard as possible (maximal contraction) for 1 to 3 seconds each rep. Exert force as quickly as possible to improve speed strength. Studies have found that the intention to move fast was more important for speed development than the actual speed of the the movement. Interesting, eh? Train about 4 to 6 reps per set and use the vibration exercises referenced above to remove residual muscle tension between sets. Since there are innumerable variations here – pushing with the arms (one or both), pushing with the legs (one of both), pulling with the arms (one or both), pulling with the legs (one or both), not to mention the number of different joint angles one can use with either push or pull, I will leave it up to your creativity to determine how to best apply it in your training. Let me know what you find works best for you.
I hope you enjoyed this short primer on isometrics. We will be exploring them in more depth, as well as showing how isometrics can be used to not only increase strength, but increase power for your strikes in my upcoming book… Stay tuned!
Today we’re going to do a fun workout based on the Tabata Protocol. If you are not familiar with Tabata, please check out the Warrior Fitness Tabata Primer found here, What’s Tabata You?
I highly suggest you warm up before doing this workout. In fact, I insist on it. What’s a good way to warm-up? I’m glad you asked. One of my favorite warm-ups is found here in my Morning Wake Up Routine. Don’t let the fact that it says morning dissuade you. It’s a quick, highly effective recharge/warm-up that can be used anytime of day.
Now, onto the workout. Warmed up? OK. Here we go –
Remember, Tabata is 8 rounds of exercise, 20 seconds on, 10 seconds off, for a total of 4 minutes for each exercise. Take one minute rest upon completion of each set of 8 rounds.
Exercise 1 – Bodyweight Squats
1 minute Rest
Exercise 2 – Hindu Push-ups
1 minute Rest
Exercise 3 – Sit Thrus
1 minute Rest
Exercise 4 – Burpees
Out of breath? Want to learn how to recover your breathing in between exercises and at the end of the conditioning session? Check out the section on restoring breath in Evolve Your Breathing.
In our last article on breathing exercises, here, we introduced the concept of using the basic push-up form as a vehicle for training the breath. Today we will continue with the push-up as the outward expression, but take a look at different types of breathing patterns to increase the depth and complexity of the the exercise.
4 Phases of Breathing
The breath cycle can be broken down into 4 distinct phases of breathing:
Inhale
Pause after inhale (full hold)
Exhale
Pause after exhale (empty hold)
Each of these phases can be manipulated within the framework of our exercise to create variation and change the focus of the exercise. Previously we had discussed how to use the inhale and exhale phases of breathing to increase capacity by fitting more movement into each breath. Today we will focus on the other 2 phases, pause after inhale and pause after exhale. These breath holds will allow us to teach the body how to utilize the oxygen it already has more effciently by working longer in a state of oxygen deprivation.
As a side note, please be aware of your body’s physiological response to breathing exercises. In general, inhalation causes a slight increase in tension and blood pressure, while exhalation causes a relaxation response and an accompanying lowering of blood pressure. These effects can be magnified by holding the breath after inhalation and holding the breath after exhalation. Therefore, please proceed with caution.
Inhale and Hold
In this exercise we will be working with the pause after inhalation. Assume the push-up position. Inhale deeply by expanding the belly. Don’t force it. Just inhale as much as comfortable for you. Pause. Do not exhale.
Perform 1 push-up.
Exhale at the top and inhale again. Perform 2 push-ups on the full hold. Exhale at the top portion and then inhale and hold. Perform 3 push-ups on the full hold.
How does it feel?
Can you do 4? 5?
Make sure you are not trying to move faster just because you’re holding the breath.
Perform the push-ups smoothly and in a relaxed manner. A side benefit of this type of work is that it helps you to work under stress. When you can’t breathe, the body begins to panic. Even though your mind knows it’s just an exercise and you can breathe at any time, your body is responding to the lack of air and begins to sound the alarm. Understand this and work with it to teach yourself to remain calm in difficult situations.
Exhale and Hold
Now let’s look at the pause after exhale, or empty hold. You know the drill by now – assume the position!
Inhale and exhale in the top portion of the push-up. Hold on the exhale and do 1 push-up. Inhale and exhale. Do 2 push-ups. Inhale at the top, exhale. Do 3 push-ups.
What do you notice about holding on the exhale versus holding on the inhale?
Much more difficult, right?
Again, note the reaction your body is having to the exercise. Are you speeding up to get through it? Are you using more muscle tension than necessary? How does the increased muscle tension affect your body’s oxygen usage? Relax and slow down. You’ll be able to handle more.
Hip to be Square Breathing
Okay. Time to put it all together. Square breathing means that each of the 4 segments or phases of the breath cycle will be of equal length. For example, inhale to a count of 5, hold on the inhale for a count of 5, exhale for a count of 5, then hold on exhale for a count of 5. The count itself doesn’t matter as long as each part is equal. Obvioudly, the difficultly level can be increased with a higher count and decreased with a lower count. For our purposes, let’s stick with the 5 count for one push-up. Begin in the up portion of the push-up. Don’t move yet, but inhale for a count of 5. Now hold the breath and slowly lower down to a count of 5. At the bottom portion of the push-up, exhale in position for a count of 5. Hold on the exhale and raise yourself back up slowly to a count of 5. Make sense?
Let me know how you make out with the above exercises and if there are any questions you have.
Today we are going to talk about push-ups. I can hear the groans already.
But these aren’t the dull, boring, uninspired push-ups you had to do in grade school gym class for some lame physical fitness challenge. Nor are these the repetitious calisthenics you had to do by the hundreds in Army Boot Camp.
Today, we are using the basic push-up as a tool, a vehicle to study and work our breath. The push-up is simply the form our breathing exercise will take, nothing more.
Sound a little more interesting now?
Let’s explore a little more…
Usually, breathing exercises are done in a very relaxed, non-stressful manner in a seated, or even lying down position.
Not today.
Breathing push-ups will help us explore our breath while moving and while under load.
Why is this important, you ask?
Consider that it’s pretty easy to control your breath while comfortably seated on the mat, and easy to relax while lying down. But how much carryover do those types of breathing exercises have to helping you withstand pressures in real life or stress in fighting? Some, certainly, but their emphasis is different. Please don’t misunderstand here though. We need a myriad of exercises to be able to influence and control physiological processes. The stationary relaxed breathing exercises absolutely do have a place in your tool kit and are important for health, stress relief, and relaxation, but are just not the focus of our discussion today.
The Structure of a Push-Up
Let’s begin in the up portion of the push-up position. Hands should be about shoulder-width apart, elbow pits facing forward. Back is straight, aligned from crown to coccyx. Very important with all the exercises here, do not use any more muscle tension than absolutely necessary to accomplish the exercise. As you progress, you’ll find less and less muscle power is needed for the same result. We’re working toward efficiency here. So, relax as much as possible and remember that the push-up is just the form, the real goal is the breath work.
Begin to inhale slightly before starting the push-up this way your breath leads the way. As you lower down, continue to inhale by expanding your belly.
No chest breathers here!
Pause at the bottom portion, then begin to exhale again slightly before initiating the upward push. The breath should guide the movement.
Play with this for several repetitions trying to really get the feel of the breath leading and supporting the movement.
Now reverse the breathing pattern. Exhale on the way down and inhale on the way up. Same rules apply.
If you feel excessive muscle tension being used, stop. Stand up and lean against a wall or a staircase in the push-up position. This will greatly reduce the demand of the exercise allowing you to concentrate on the breathing aspect while still performing the movement of a push-up. When you feel comfortable with the movement, drop back down to the floor and try again. Keep the same light feeling you had while doing the push-ups against the wall or stairs.
Building Capacity
Once you get the hang of the breath leading the movement of the push-up, we will begin to work on expanding your breathing capacity. Here we will stretch out the inhale and exhale to fit more movements into each breath cycle.
For example, begin again in the upward portion of the push-up position. Exhale completely without moving. Begin the inhale slightly before the lowering movement and continue to inhale all the way down and all the way back up. Exhale. Now try to do 2 push-ups on one inhale. If you can do 2, try 3. See how many movements you can fit into one inhale, it’s not easy! Make sure you don’t rush that will only add tension and gas you out even quicker. Maintain relaxation and an even pace throughout.
Once you’ve done a few reps by expanding your inhale, try to do the same thing on an exhale. Start in the top portion of the push-up, inhale completely without moving. Begin your exhale slightly before the downward movement and continue through the whole push-up. Try 2, 3, 4, see how many reps you can do on one exhale.
One way to do this in a set is to do a breathing ladder. Do one push-up on one inhale. Exhale at the top. Then do 2 push-ups on one inhale. Exhale at the top. Then do 3 push-ups on one inhale. Exhale at the top. Try to do 4 on one inhale. Now, reverse it, inhale at the top and do 4 push-ups on one exhale. Then 3 on one exhale. Then 2. Then one push-up on one exhale. Get the idea?
Hopefully this is a fun and productive exercise for you. Let me know how it works and if you have any questions!
Stay tuned for Part 2 of this article where we’ll discuss breath holding.