10 Step Upper Body Pushing Progressions
By Logan Christopher
Back in 8th grade my older brother started training me to get ready to go out for the football team in high school. He was a star player and hoped I would follow in his footsteps.
Unfortunately, to say I was weak and unathletic was an understatement. When I started, I couldn’t even do a regular pushup in good form!
Fast forward many years later and I’m repping out full range handstand pushups.
That is what progressive strength training can do when you follow it consistently. Progression is a fairly simple concept, but one that most trainees unfortunately don’t really get. This is especially true when it comes to bodyweight training.
My goal in this article is to give you the keys to progression by showing how you too can go from not even being able to do a regular pushup to full range handstand pushups. (And if you’re anywhere in between that means you’ll just get there with fewer steps.)
The trick with bodyweight exercise is to do progressively harder variations of an exercise over time. This is done by manipulating leverage, range of motion, body position and more. Here’s the ten steps and then we’ll dive into details on each one.
1. Knee pushup
2. Incline pushup
3. Regular pushup
4. Decline pushup
5. Pike pushup
6. Handstand shrug
7. Partial handstand pushup
8. Handstand pushup
9. Elevated handstand pushup
10. Full range handstand pushup
These are the ten steps for this exercise series as I lay out inside of The 80/20 Strength Challenge. There’s more detail inside the course, but below is enough to get started with.
Step 1 – Knee Pushup
Kneel down. Place your hands flat on the ground approximately shoulder width apart. Straighten your body so that you are one line from the thighs, the back, up to the shoulders. Do not let the hips pike up or sag. The head should be kept in a neutral position.
Start with the arms locked out then allow the elbows to unlock and the body to be lowered by the strength of the arms. Do not protrude your head or sink your hips to touch the ground. Lower under control until your chest touches the ground then push back up. This is one repetition and should be repeated.
Step 2 – Incline Pushup
Get something stable like a chair (without wheels). Make sure this will not move, fold or otherwise put you in danger. Platforms, steps, or various other objects can be used.
Place your hands on the chair. Walk your feet back so that your body can be a straight line from the legs through the back. Do not let the hips pike or sag. I’m going to be saying that a lot. Lower by the strength of your chest and arms. You might touch your chest to the chair. It depends a bit on the angle and the chair. Push back up. This constitutes one rep. Repeat.
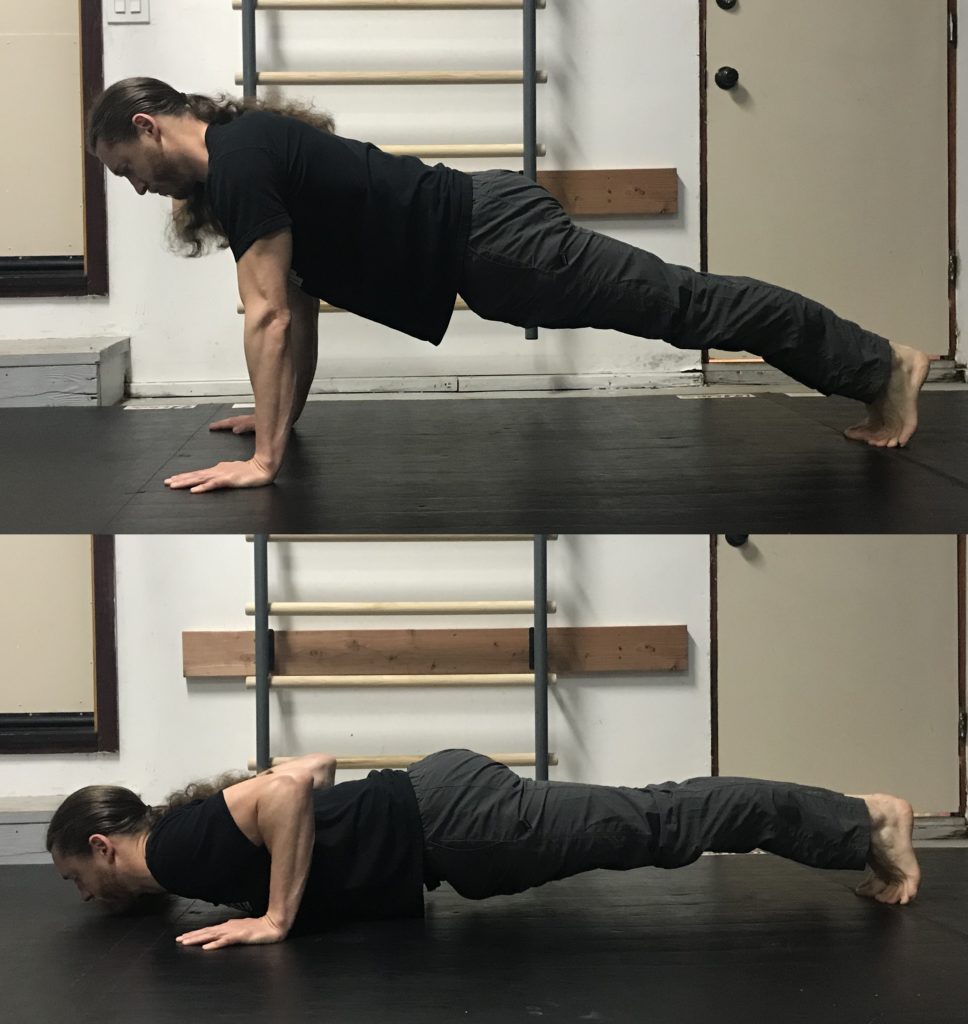
Step 3 – Regular Pushup
To maintain good form your body should be kept tight. Do not allow any sagging in the hips. Do not have your butt sticking up in the air either. Your body should form a straight line and be kept rigid like a board.
Your hands are placed on the ground shoulder width apart with the fingers pointing forward. Lower your body with your arms and the elbows close to the sides. Do not make the common mistake of letting your elbows flare out to the sides. This can be bad for your shoulder joints. Keep the elbows in! Your chest should touch the floor lightly and then you press back up. Repeat for reps.
Step 4 – Decline Pushup
Using the same stable chair or other object as before, this time place your feet on it and your hands on the ground. Otherwise, the form is the same as in the normal pushup.
Step 5 – Pike Pushup
Place your hands on the ground shoulder width apart and fingers facing forward. You must keep your legs straight with your butt up in the air when you perform this exercise. This is that same as a downward dog position in yoga.
Bend your arms while keeping your legs straight. Your heels will come off the floor. Touch your head or nose to the ground and push back up. Your elbows should not flare out to the sides much, if at all, but stay in line with your body.
Step 6 – Handstand Shrug
From the pressed out handstand position relax your shoulders and think of bringing them toward your armpits. Pull them into the socket. But do not bend your elbows. The arms should remain tensed and locked out throughout this exercise. Even think about squeezing the triceps hard enough to cramp them. The movement is made solely by the shoulder girdle. It is awkward at first but can be mastered with a bit of practice.
After you have lowered by action of the shrug you press back up. Repeat back and forth. Once again, do not bend the arms. This exercise only takes you through an inch or so of motion. With practice, you can do a large number of repetitions in this exercise.
Step 7 – Partial Handstand Pushup
We switch from the handstand shrug to bending the elbows, but only for a partial range of motion (ROM). The easiest way to do this is to place a stack of books or something similar under your head. Thus, instead of lowering your head all the way to the ground, it only touches these books then you press back up.
Once your stack is in place, get up into the handstand in the same steps as before. Once locked out, bend the elbows so that the top of your head lowers down to the stack. As soon as it touches press back up to lockout. Repeat. Remember to breathe.
Step 8 – Handstand Pushup
Kick up into a handstand against the wall. Keep your head in line with your arms. Bend the elbows and lower yourself under control until your crown touches the floor then press back up to lockout. It is best to touch the top of your head to the ground, instead of looking down and touching your nose. The latter is harder and then causes more arch in the back. Arch is not bad, unless it is overdone.
Step 9 – Elevated Handstand Pushup
You can use many objects for this. Pushup handles, parallettes, steps, mats, chairs, blocks of wood, kettlebells, hand balancing stands and stools all work. One caveat with whatever you choose to use. I shouldn’t need to tell you that dire consequences could result from using unstable or poor equipment. As long as it provides a stable place to put your hands and it will hold your full body weight it will work.
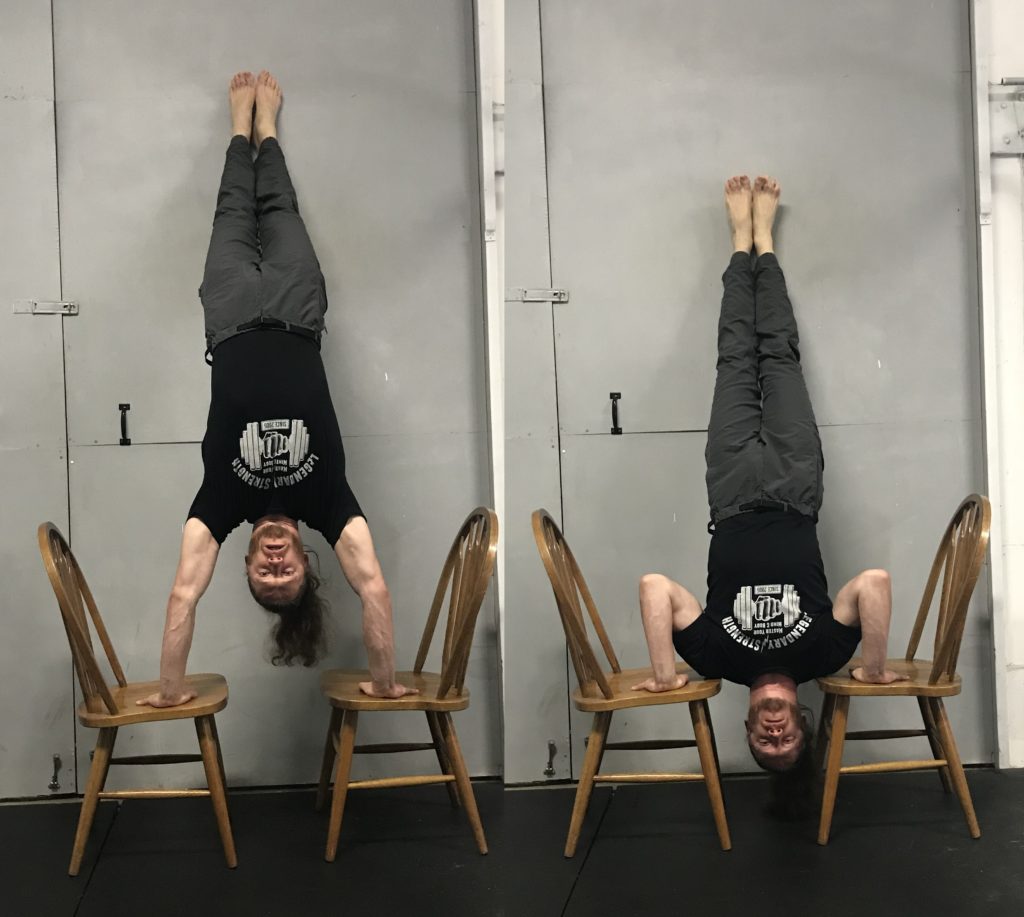
Step 10 – Full Range Handstand Pushup
The handstand pushup as covered in any of the prior steps is actually only a partial range movement. Step 8 is just the top half of a press. The previous move extends this a bit further. But here with the full range handstand pushup we’re finally going to get the complete range of motion.
Kick up to a handstand against the wall with your hands firmly placed on two sturdy objects like chairs. Lower under control until your hands are touching your shoulders. Press back up to lock out.
How to Progress from Step to Step
You obviously won’t go from one exercise to the next in a single workout, but that’s where another key aspect of progression comes in. I’m talking about volume!
It doesn’t matter what step you’re at, in your workouts you want to build up the amount of volume that you can do.
How many reps can you do in a single set?
If you can do five today, aim for six next time.
How many total reps, spread across many sets, can you do?
If you can do 30 total reps today, aim for 31 or more next time.
Increase these numbers over time and it means you’re getting stronger. Get stronger and soon enough you’ll be able to move onto the next step. And then the next step.
Over time, this is how you too can go from not being able to do regular pushups to full range handstand pushups. It’s how I did it and it’s how you can too.
Want more? Inside The 80/20 Strength Challenge you’ll find more details on the above exercises, as well as similar progressions for squats, inverted rows to pullups, hanging knee and leg raises. You’ll also find a precise structure that makes sure you improve in all of these in just one hour per week of work.
Find out more details here.